

Key Takeaways
Start here
Assessing and Preparing the Subfloor
Next
Planning Your Tile Layout
Then
Choosing the Right Adhesive
Apply
Setting the Tiles
Finish
Grouting and Finishing
Assessing and Preparing the Subfloor
A tile installation is only as good as what lies beneath it. Before buying a single tile, inspect the existing subfloor carefully. Press down firmly across the entire floor area, feeling for soft spots, bounce, or flex - any movement here will eventually crack grout joints and loosen tiles.
For most US homes, bathroom subfloors are plywood or OSB over floor joists. Neither material tolerates prolonged moisture exposure well. The standard solution is to install a layer of cement backer board (such as cementitious tile backer) or an uncoupling membrane directly over the subfloor. These materials create a stable, moisture-resistant base suited to wet areas.
Subfloor
The structural layer of boards or panels beneath your finished floor. It must be solid and flat before any tile is laid.
Cement backer board
A rigid panel made from cementitious material used as a stable, moisture-resistant base layer for tile in wet areas like bathrooms.
Thin-set mortar
A cement-based adhesive mixed with water (and sometimes polymer additives) used to bond tile permanently to a substrate.
Grout
A cement-based filler pressed into the gaps between tiles after the adhesive cures. It seals joints and ties the finished surface together visually.
Uncoupling membrane
A thin plastic mat installed between the subfloor and tile layer that absorbs floor movement to reduce cracking in tile and grout.
Rectified tile
Tiles that have been machine-cut to precise, uniform dimensions after firing, allowing narrower grout joints and a cleaner overall look.
Use a long level or straightedge to check for high and low spots. Industry guidance from the Tile Council of North America (TCNA) specifies that floors should be flat within 1/4 inch over a 10-foot span, or 1/8 inch over a 2-foot span. Fill low spots with floor-leveling compound; grind down high spots or add thin shims. Skipping this step is the leading cause of premature tile failure.
Before you begin, read up on costs homeowners often overlook before renovating - subfloor repairs are a common surprise expense worth budgeting for in advance.
Planning Your Tile Layout
Never start tiling from a wall. Walls are rarely perfectly square, which means tiles laid from a corner will appear increasingly crooked as you work across the room. Instead, find the visual center of the floor.
Measure the room's length and width, then snap chalk lines at the midpoints of each pair of opposite walls. Where the lines intersect is your starting point. Do a dry layout - place tiles without adhesive along both chalk lines - to preview how cuts will fall at the edges. Aim for cuts of at least half a tile width at all perimeter walls; slivers look unfinished and are harder to cut cleanly.
If the dry layout reveals a narrow cut on one side, shift your center point by half a tile in that direction. This takes minutes on paper and saves hours of regret once adhesive is involved.
Do a Full Dry Run First
Lay out your entire tile pattern - including cuts - without any adhesive before you mix anything. This lets you identify awkward cuts, adjust your starting point, and confirm you have enough tile (including a 10% overage for breakage). A dry run takes an hour and can save an entire wasted day of work.
This floor project fits naturally into a larger bathroom update. If you are sequencing multiple upgrades, the guide on renovating a bathroom in phases explains how to keep each stage functional while work continues.
Choosing the Right Adhesive
For bathroom floor tile, thin-set mortar is the standard adhesive. It bonds securely, handles moisture, and works with the widest range of tile types. Thin-set comes in two main categories: unmodified (mixed with latex additive on site) and polymer-modified (additive already included in the dry mix).
Polymer-modified thin-set is the practical choice for most DIY floor projects - it is forgiving, widely available, and performs well under ceramic, porcelain, and many natural stone tiles. Large-format tiles (generally 15 inches or larger on one side) benefit from a medium-bed mortar, which supports more weight without slumping.
Avoid mastic adhesive on bathroom floors. It is water-soluble and not suitable for areas that get wet regularly. Check the tile manufacturer's guidance: some materials, particularly certain natural stones, require specific adhesive formulations to avoid staining or chemical reactions.
Setting the Tiles
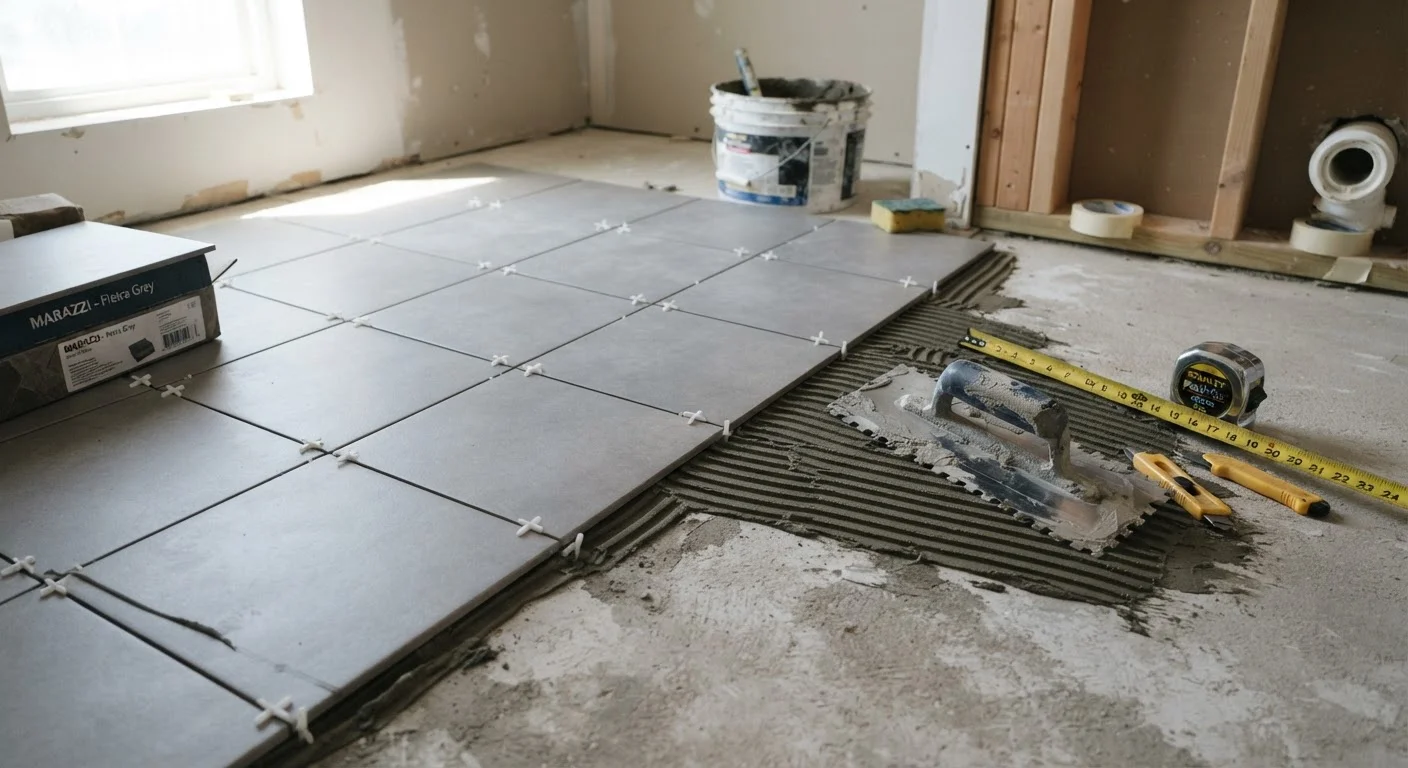
Mix thin-set to a smooth, peanut-butter consistency - it should hold a ridge without slumping. Using a notched trowel (the notch size is matched to tile size; the tile or adhesive packaging will specify), spread adhesive over a manageable area of roughly 2 to 3 square feet at a time. Working in small sections prevents the adhesive from skinning over before you set the tiles.
Press each tile firmly into the adhesive with a slight twisting motion to ensure full contact. Use plastic tile spacers to maintain consistent joint widths. Periodically lift a tile and check the back - adhesive coverage should be at least 80% of the tile surface in dry areas, and 95% in wet zones per TCNA guidelines.
Use a rubber mallet and a beating block (a piece of scrap wood padded with a cloth) to tap tiles level. Check frequently with a level across multiple tiles. Remove spacers before the adhesive sets fully - typically within a few hours.
Grouting and Finishing
Wait for the thin-set to cure fully before grouting - 24 hours is a common minimum, but follow the adhesive manufacturer's guidance. Choose a sanded grout for joints wider than 1/8 inch; unsanded grout for narrower joints. Color matters practically as well as aesthetically: lighter grouts show staining more readily in a bathroom environment.
Mix grout to a smooth, lump-free consistency. Apply it diagonally across the joints using a rubber grout float, pressing firmly to fill completely. Work in sections of 10 to 15 square feet. After about 15 to 20 minutes (when a light haze begins to form), wipe away excess with a damp sponge using diagonal strokes. Rinse the sponge frequently and change the water often.
Don't Grout Too Soon
Grouting before thin-set mortar has fully cured is one of the most common DIY mistakes. Premature grouting traps moisture, weakens the adhesive bond, and can cause tiles to shift or pop loose. Check the adhesive packaging for the recommended cure time and err on the side of waiting longer, especially in humid bathrooms.
Allow grout to cure for the time specified on the packaging - typically 48 to 72 hours - before applying a grout sealer. Sealer fills the porous surface of cement-based grout, significantly reducing moisture absorption and staining. Reapply sealer annually in high-use bathrooms to maintain protection.
This article is for general informational purposes only. Building codes, permit requirements, and material specifications vary by location. Always verify local requirements with your municipality and consult a licensed professional for structural, plumbing, or electrical work associated with your project.