

Key Takeaways
Why a Running Toilet Is Worth Fixing Promptly
A toilet that runs continuously - even quietly - can waste a substantial volume of water. According to the U.S. Environmental Protection Agency, a single leaking toilet can waste 200 or more gallons per day depending on the severity of the leak. Beyond the environmental impact, that waste appears directly on your water bill month after month.
The good news: the vast majority of running toilets involve one of three inexpensive, user-replaceable components inside the tank - the flapper, the fill valve, or the float. None of these repairs require soldering, cutting pipes, or specialized skills. With basic hand tools and parts from any hardware store, most homeowners can resolve the problem in under an hour.
Use the Dye Test to Confirm a Flapper Leak
Drop a few drops of food coloring into the tank and wait 10-15 minutes without flushing. If color appears in the bowl, your flapper is not sealing properly and needs replacement. This test costs nothing and removes guesswork before you buy parts.
What You'll Need Before You Start
Gathering materials ahead of time prevents mid-repair hardware store trips. Review the prerequisites and tools below before touching the tank lid.
What you will need
Adjustable Pliers
Used to loosen and tighten the fill valve locknut during replacement.
Replacement Flapper
Seals the flush valve seat; replaced when worn or warped to stop water from leaking into the bowl.
Replacement Fill Valve
Regulates tank refill after flushing; replaced when the toilet runs continuously after flapper is confirmed functional.
Small Bucket or Towels
Catches residual water remaining in the tank after the supply is shut off.
Food Coloring
Used in the dye test to confirm whether the flapper is leaking without opening the tank.
When selecting a replacement flapper, bring the old one with you to the store or photograph your toilet's model number (usually stamped inside the tank) to ensure compatibility. Universal flappers work for many toilets but not all.
Step-by-Step Repair Instructions
Follow these steps in order. Completing the diagnostic steps first - before buying any parts - avoids unnecessary purchases and speeds up the overall repair.
Turn Off Water Before Any Repair
Always shut off the water supply valve located at the wall behind or beneath the toilet before removing any internal components. Skipping this step can cause overflow and water damage to your floor and subfloor. If the shut-off valve is corroded or won't turn, stop and contact a licensed plumber rather than forcing it.
Identify the Source of the Running Water
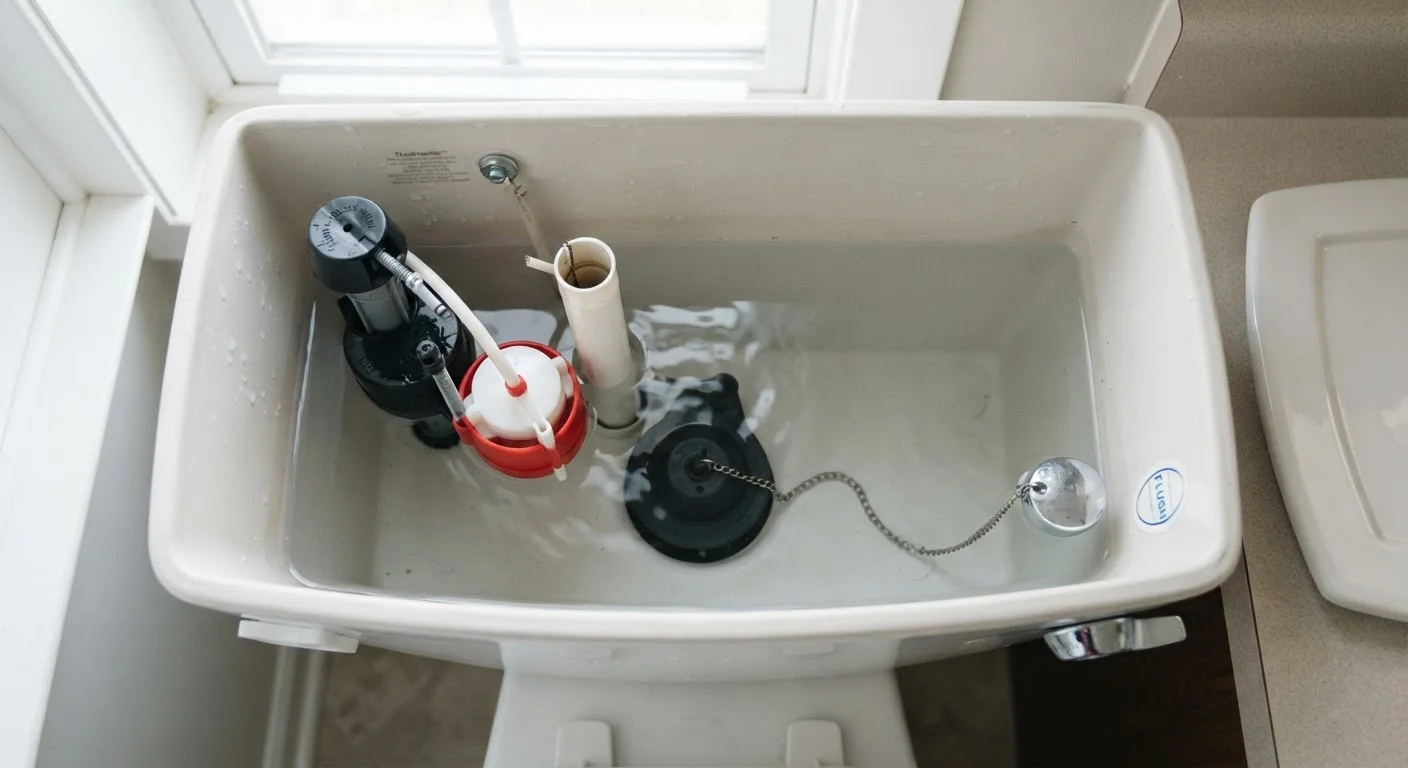
Remove the tank lid carefully and set it aside on a flat surface. Listen and watch: if water is trickling into the bowl, the flapper is likely the culprit. If water is running out through the overflow tube (the tall vertical tube in the center of the tank), the float is set too high. Perform the dye test to confirm a flapper leak before purchasing parts.
Shut Off the Water Supply
Turn the shut-off valve clockwise until it stops. Flush the toilet once to drain most of the water from the tank. Use a towel or small bucket to absorb any remaining water at the bottom of the tank so you can work cleanly.
Inspect and Replace the Flapper
Unhook the flapper ears from the pegs on either side of the flush valve seat, then disconnect the chain from the flush handle arm. Examine the flapper: if it feels spongy, warped, or shows mineral deposits, it needs replacement. Match the old flapper to a new one (or note your toilet's make and model). Snap the new flapper onto the flush valve pegs and reconnect the chain, leaving about half an inch of slack.
Adjust or Replace the Fill Valve and Float
If the flapper is not the issue, check the float. On a ball-float design, bend the float arm slightly downward so the water shuts off about one inch below the top of the overflow tube. On a cup-float design (the more common modern style), pinch the clip on the float and slide it downward along the fill valve shaft to lower the water level. If the fill valve hisses, drips from the top, or doesn't shut off reliably even after float adjustment, it is due for replacement - a straightforward swap described in the next step.
Replace the Fill Valve (If Needed)
With the water still off and tank emptied, disconnect the supply line from the base of the fill valve underneath the tank. Use adjustable pliers to unscrew the locknut (turn counterclockwise). Lift the old fill valve out. Insert the new fill valve, following the manufacturer's length adjustment instructions so it sits correctly relative to your overflow tube height. Hand-tighten the locknut, then snug it with pliers - avoid overtightening, which can crack the tank. Reconnect the supply line and clip the refill tube onto the overflow tube, trimming it so it does not sit below the waterline inside the tube.
Restore Water and Test the Repair
Turn the shut-off valve counterclockwise to restore water flow. Allow the tank to fill completely, then flush and observe. Confirm the fill valve shuts off cleanly, the water level is one inch below the overflow tube, and no water is trickling into the bowl. Repeat the dye test if you want a final confirmation that the flapper is sealing correctly.
Troubleshooting If the Toilet Still Runs
If the toilet continues to run after replacing the flapper and adjusting the float, check these less common causes:
- Overflow tube height: If the tube is too short for your tank's design, water may constantly spill into it. This typically requires a fill valve sized to match the tank.
- Flapper seat damage: Mineral deposits or a chipped flush valve seat can prevent any flapper from sealing. Inspect the seat by running your finger around its rim. If it feels rough or pitted, a flush valve seat repair kit - or a full flush valve replacement - may be needed.
- Supply line pressure: Unusually high household water pressure can overwhelm a fill valve. A plumber can test and install a pressure-reducing valve if this is suspected.
When to Call a Professional Instead
If the shut-off valve is seized, the toilet base shows signs of leaking, or you discover cracks in the tank or bowl, these are situations that typically require a licensed plumber. DIY repairs are appropriate for internal tank components only. Never attempt structural repairs or work involving the main water line without professional assistance.
Most homeowners successfully resolve a running toilet with a flapper or fill valve swap. If the problem persists after methodical troubleshooting, a one-time plumber visit is still far less costly than months of wasted water on an unresolved leak.