

Key Takeaways
Why Brake Pad Wear Deserves Your Attention
Brake pads are a consumable component - they are designed to wear down over time as they generate the friction needed to slow your vehicle. Because the wear happens gradually, it can be easy to overlook until a problem becomes obvious. By that point, you may be dealing with damaged rotors, reduced stopping power, or a repair bill significantly larger than a straightforward pad replacement.
The good news is that brake pad wear gives you multiple warnings before it becomes critical. Understanding those signals - and knowing how to check for them - puts you in control of your vehicle's safety rather than reacting after something goes wrong.
Brakes Are a Safety-Critical System
Brake pad replacement involves your vehicle's primary safety system. If you are not confident performing this work yourself, have a qualified mechanic carry out the inspection and any replacement. Incorrect installation can lead to brake failure. This guide focuses on identifying wear signs - not on performing the replacement itself.
Typical brake pad lifespan varies considerably depending on driving style, vehicle type, and the quality of the pads installed. City driving with frequent hard stops wears pads faster than highway driving. Many manufacturers suggest inspecting pads roughly every 12,000 miles, but treat that as a starting point rather than a guarantee. Your driving habits and environment matter more than any general figure.
How to Check and What to Do Next
The steps below walk you through recognizing wear signs both inside and outside the car. You do not need to be a mechanic to carry out a basic inspection - most of what matters is observation and knowing what to look for.
What you will need
Flashlight or work light
Illuminates the brake caliper and pad through the wheel spokes for a clear visual inspection.
Ruler or brake pad wear gauge
Measures remaining friction material thickness - useful if you remove the wheel for a closer look.
Jack stands and a floor jack
Required if you choose to remove a wheel for a more thorough inspection. Only needed for that optional step.
Know the common audible warning signs
Your ears are often the first line of defense. Brake pads on most modern vehicles include a small metal wear indicator - a thin tab designed to contact the rotor and emit a high-pitched squeal when the pad wears down to a threshold thickness. This sound typically appears during normal braking and may go away when you press the pedal harder, only to return when you ease off.
A deeper, grinding or scraping noise is a more serious signal. It often means the friction material is largely or fully gone, and metal is contacting metal. At that stage, both stopping power and rotor condition are at risk.
Feel for pedal and steering changes
Pay attention to how braking feels from the driver's seat. A brake pedal that sinks lower than usual before the car slows - sometimes called a 'soft' or 'spongy' pedal - can indicate low brake fluid, often a downstream effect of worn pads (as pads wear, the caliper piston extends further and the fluid reservoir level drops). See our guide to checking brake fluid and other essential fluids for how to inspect the reservoir safely.
Vibration or pulsing through the pedal when stopping can point to uneven pad wear or warped rotors - both worth professional evaluation. Pulling to one side during braking can indicate uneven wear between the left and right pads.
Perform a visual inspection through the wheel
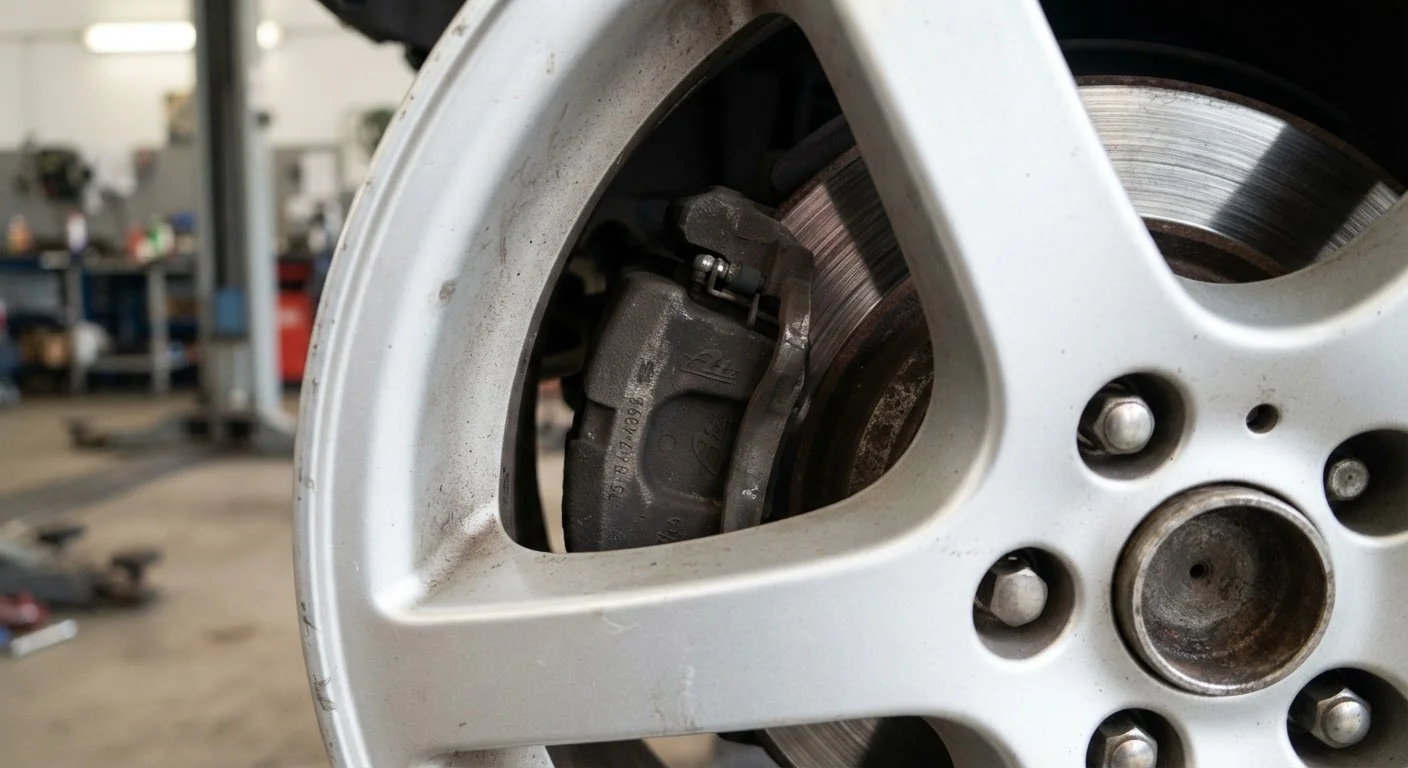
Park on a flat surface, apply the parking brake, and allow the wheels to cool completely. Using a flashlight, look through the spokes of each wheel toward the brake assembly. You should be able to see the brake rotor (a smooth metal disc) and, clamped around its outer edge, the caliper. Inside the caliper you can usually see the outer brake pad pressed against the rotor face.
Estimate the thickness of the friction material - the lighter-colored layer bonded to a metal backing plate. If that layer appears to be roughly the thickness of a quarter (about 3mm) or less, it is approaching the replacement threshold used by many mechanics. If you see little to no friction material, or the metal backing is nearly flush with the rotor, have the vehicle inspected immediately.
Watch for dashboard warning lights
Some vehicles are equipped with an electronic brake pad wear sensor that triggers a dashboard warning light when pads reach minimum thickness. Not all cars have this feature, and those that do vary in how the light looks - it may be labeled BRAKE, show an exclamation mark inside a circle, or display a specific pad-wear icon. Consult your owner's manual to confirm what your vehicle uses.
A lit brake warning light should never be ignored. It could indicate low brake fluid, worn pads, or an issue with the braking system. Our dashboard warning lights reference explains what common brake-related indicators mean and how urgently to respond.
Decide whether to inspect further or go to a mechanic
If your visual check or warning signs suggest wear is near or past the threshold, the next step is a hands-on inspection - ideally by a qualified mechanic who can measure pad thickness precisely, assess rotor condition, and check caliper function. Brake pad replacement is a task some careful home mechanics handle themselves, but it requires proper tools, jacking safety procedures, and an understanding of the full brake assembly.
Before any long drive, brakes should be on your pre-departure checklist. Our mechanical readiness checklist for road trips covers brakes alongside other critical systems to verify. If you are unsure where the line is between DIY and professional work, this guide on DIY car maintenance boundaries can help you decide.
Check Pads at Every Tire Rotation
Many mechanics recommend inspecting brake pads every time your tires are rotated - typically every 5,000-7,500 miles. Because the wheels come off anyway, it costs little extra time and catches wear before it becomes urgent. Ask your shop to note the estimated remaining pad thickness each visit so you can track the rate of wear.
Do Not Drive on Metal-to-Metal Brakes
If you hear a harsh grinding noise when braking, the friction material may be fully depleted and the metal backing plate may be contacting the rotor. This situation dramatically reduces braking effectiveness and can cause rotor damage. Have the vehicle inspected by a mechanic as soon as safely possible - avoid highway driving until it has been checked.
This article is for general informational purposes only. Brake system work involves your vehicle's primary safety system. When in doubt, have a qualified, licensed mechanic perform any inspection or repair.